Getting Started
This chapter will help you to create and setup a project that uses
UBStore. To simplify everything, this chapter will be based on the
example project that is contained within the ubstore-core package.
(You can get a copy of it from our maven repository)
We will also discuss the structure of the project and how the setup
works. Hopefully, this will help building on top of the basic example
project.
In theory, all you need in order to run the example project is
to install Gradle, cd into the
example-project directory and run gradle osgiRun. And of course,
coding could be done using any text editor. However, we are also
going to show how to get a working environment using Eclipse.
Setting up the example project in Eclipse
- Install Eclipse
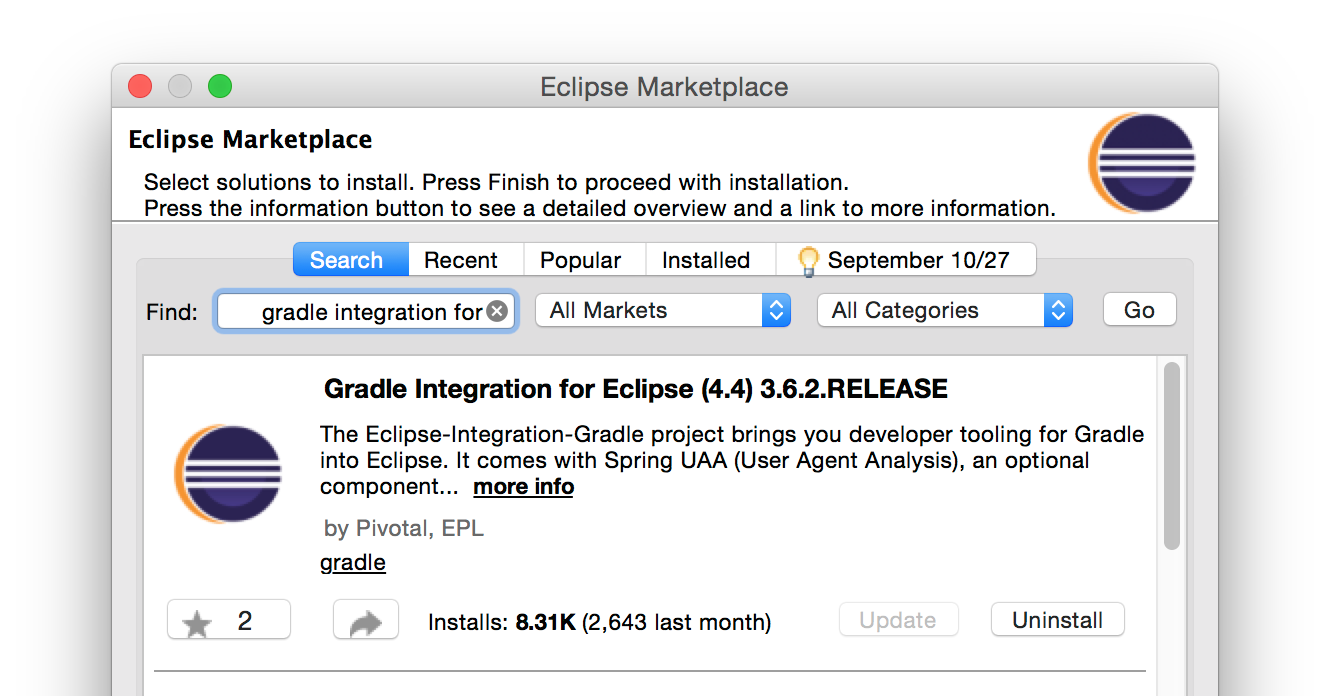
- Install the Gradle plugin for eclipse, either directly,
or by searching the Eclipse Market Place for “Gradle Integration
for Eclipse”:
- (Optional) If you want to have syntax highlighting and code completion for Gradle files, install the Groovy Plugin for Eclipse
- Download the
ubstore-corearchive and extract the example-project from it. - In eclipse, select file File -> Import… -> Gradle Project.
The following window emerges
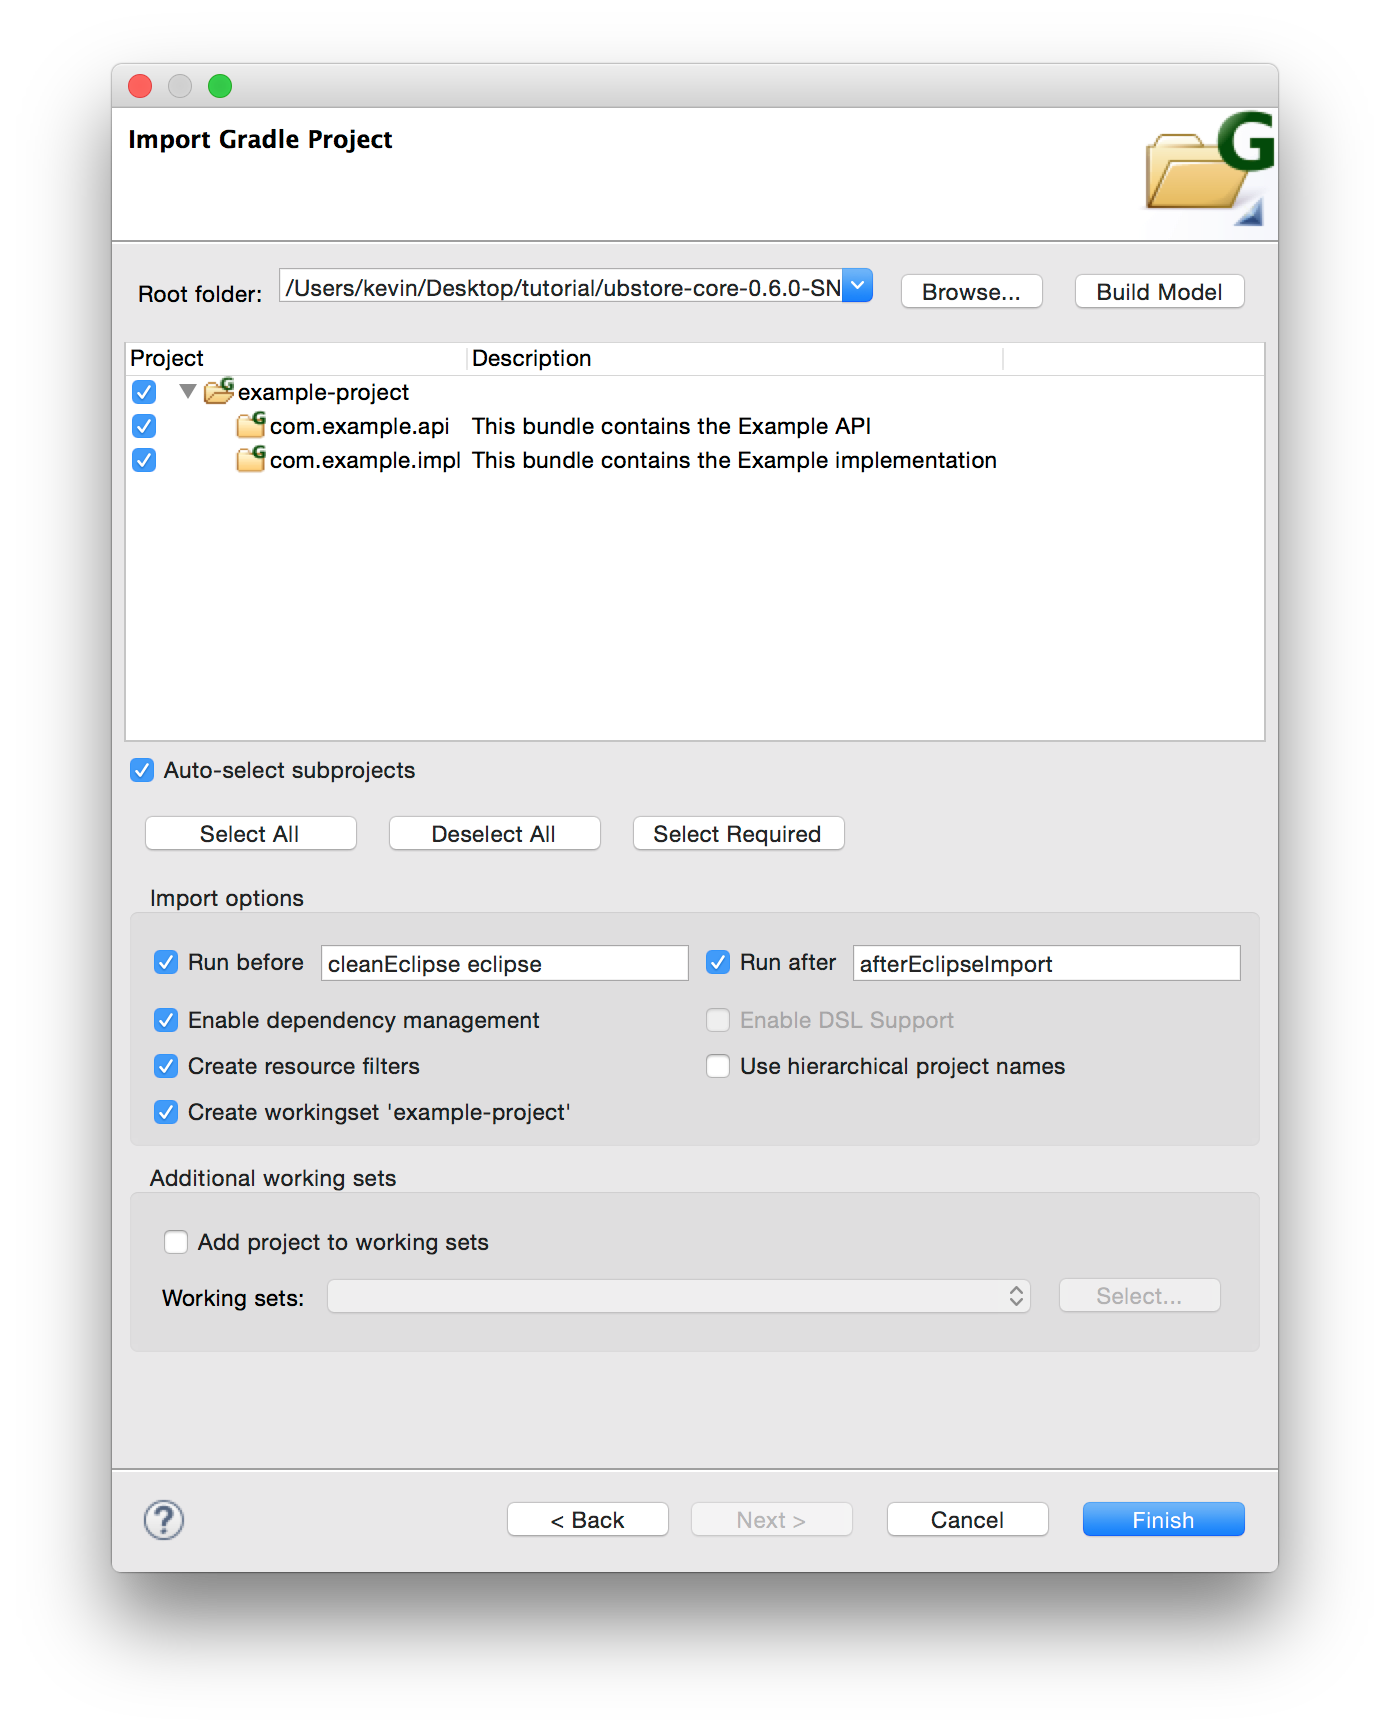
- Click Browse… and select the example-project directory
- Click Build Model. Eclipse will then analyze the gradle build script and display all the (sub-)projects that are contained within.
- Select all of the (sub-)projects
- Click finish. Eclipse will create the projects and download dependencies automatically.
Exploring the example project
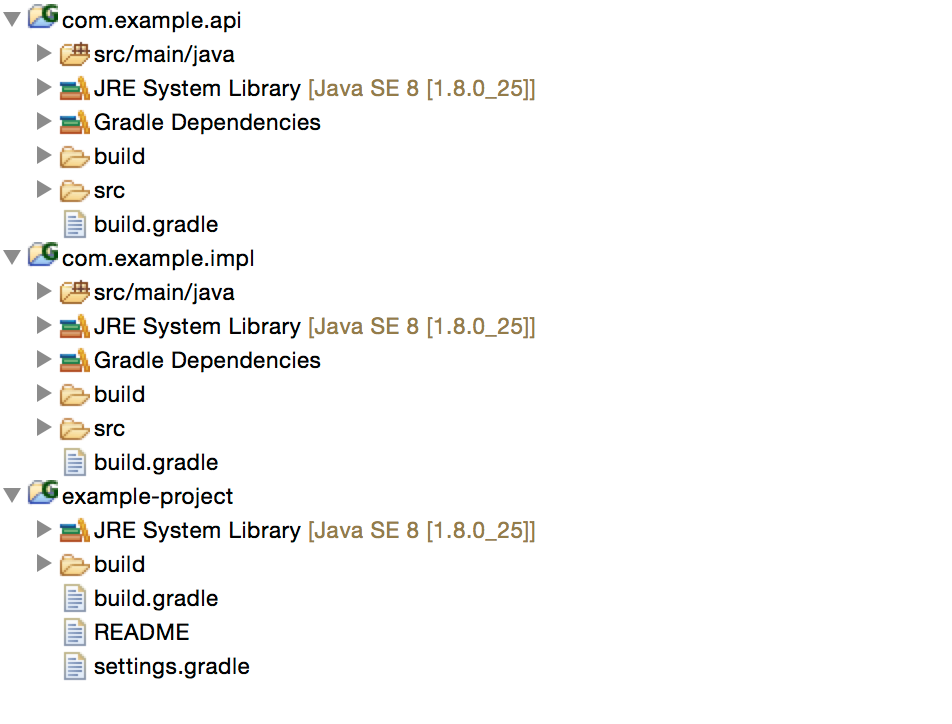
Having imported the example-project with all its subprojects,
eclipse shows something similar to this:
On OSGi bundles and sub projects
First, it is important to understand the structure of the
example-project: Adhering to common OSGi practice, it
splits itself into two related OSGi bundles, namely the
API bundle (com.example.api) and the implementation bundle
(com.example.impl). OSGi applications are commonly split
into multiple bundles, not only for decoupling API and
implementation, but also to increase modularity: it is
highly encouraged to separate theoretically independent
functionality into several re-usable bundles.
However, although divided into multiple bundles, a set of
bundles together form one project. To give an example
that would be possile within UBStore, one application could
consist of several bundles that contain custom implementations
of some UBStore interfaces like the data access
or shepherd,
the actual application layer and a user interface. All of
this could be implemented in four separate (although probably
inter dependent) bundles.
The example-project reflects this approach in its build structure: Both bundles reside within their own subproject. The root project serves as a container for all these related projects.
Eclipse actually shows this by displaying three projects when imported: the two API and implementaiton bundles, as well as the root project that defines them in its build file.
example-project defines
its subprojects in the settings.gradle file.
It does *not* automatically add subdirectories.
The Build System (gradle)
The example project uses Gradle as a build system. We chose Gradle for the following reasons:
- There is a bnd based Gradle plugin that can generate OSGi bundle jars.
- It can handle maven dependencies easily at the same time.
- It enabled us to write a UBStore gradle plugin that defines several settings for a UBStore project like dependencies on the UBStore core, the Java compile version and tasks that build a deployable package of your UBStore application.
The Gradle build script that is contained within the
example-project does a lot of things for us,
the most obvious one enabling us to build the project.
To test this, open the Gradle View in eclipse
(Window -> Show View -> other... -> Gradle Tasks).
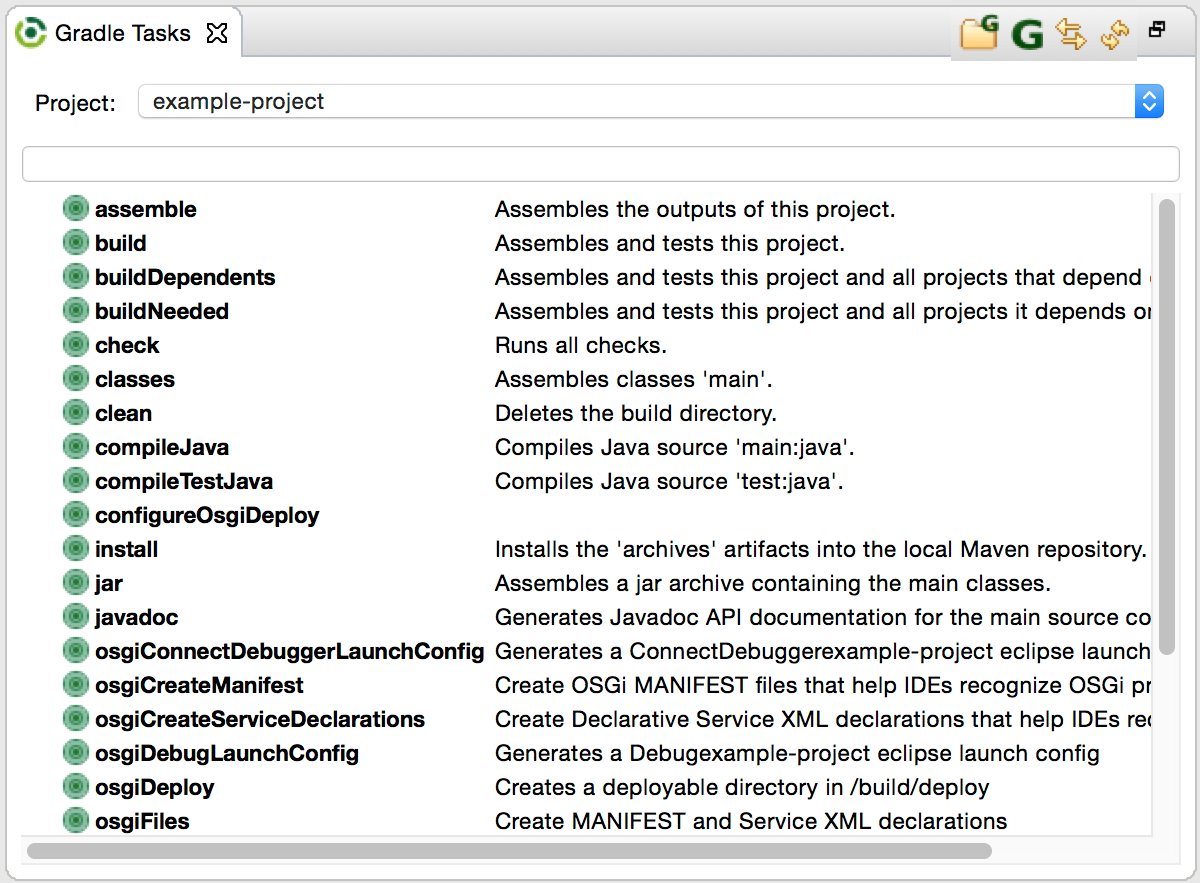
It shows a drop-down menu that allows you to choose a
project as well as a list of tasks that are available
for that project. When running the jar task for root project
example-project, gradle will build the bundle
jars for both sub projects that appear in the build
subdirectory of each sub project.
Dependencies
Besides being responsible for the actual build of the
project, Gradle also automatically handles dependencies:
it automatically downloads all external dependencies
from a maven repository and adds them to the build path.
In eclipses package explorer, these dependencies are
visibile in the Gradle Dependencies subitem in the
API and implementation subprojects. When unfolding
com.example.impl -> Gradle Dependencies, we can see
that the project depends on the following:
- The UBStore core API, implementation and helper
- OSGi core and compendium
- The SLF4J API, the logging facade that UBStore uses.
- The default implementations of the data access, shepherd and router
- A bunch of other stuff that is needed at runtime (logback, Apache Felix SCR, etc.)
Sadly, eclipse does not show that Gradle actually separates these dependencies into compile time and runtime dependencies. Example: While you program against the APIs of UBStore core and helper, SLF4J and OSGi (which makes them needed at compile time), the implementations of these (UBStore core impl, memorydataaccess, simple router and shepherd and logback) are only needed at runtime. As previously said, while they implement the APIs provided by the API packages, the implementations are interchangeable and could be swapped out with something else. As a result, you should avoid programming against the actual implementations if possible. For example, you could exchange the MemoryDataAccess with your own custom implementation or logback with another implementation of SLF4J.
Most of these dependencies are defined within the
subprojects respective build.gradle file which
contain a dependencies subsection. The separation
of compile time and runtime dependencies is visible
in there.
Where do dependencies that are not explicitly defined
in the build script come from? One part of the
dependencies come from the explicit dependencies’
dependencies, e.g. logback-classic itself depends on
logback-core, and UBStore core depends on OSGi.
The rest (i.e. UBStore core and SLF4J) is implicitly
defined by applying the UBStore gradle plugin
which is done in the root projects build.gradle
file.
Building and running the project
The build script (to be more specific, the Gradle plugins
it applies) defines several tasks that help running,
deploying and debugging UBStore projects. They are
prefixed with osgi.
Using the command line, as already mentioned, the easiest
way of running the project is to run the osgiRun task.
Sadly, when running the task in eclipse, it does not allow
for any input in the console, resulting in OSGi shutting
down immediately after starting.
However, there are several other tasks that make running and deploying your project easy:
- osgiDeploy builds a directory that contains everything
that is needed for running the project: an OSGi framework
implementation (Apache Felix), UBStore, and all dependencies
defined in the Gradle build script. It also copies everything
from the
src/main/resources/osgideploy/directory into the deploy directory. The deploy directory is located inbuild/deploy, and it can be run by executing thestart.shscript. - osgiLaunchConfigs generates a directory called launchConfigs
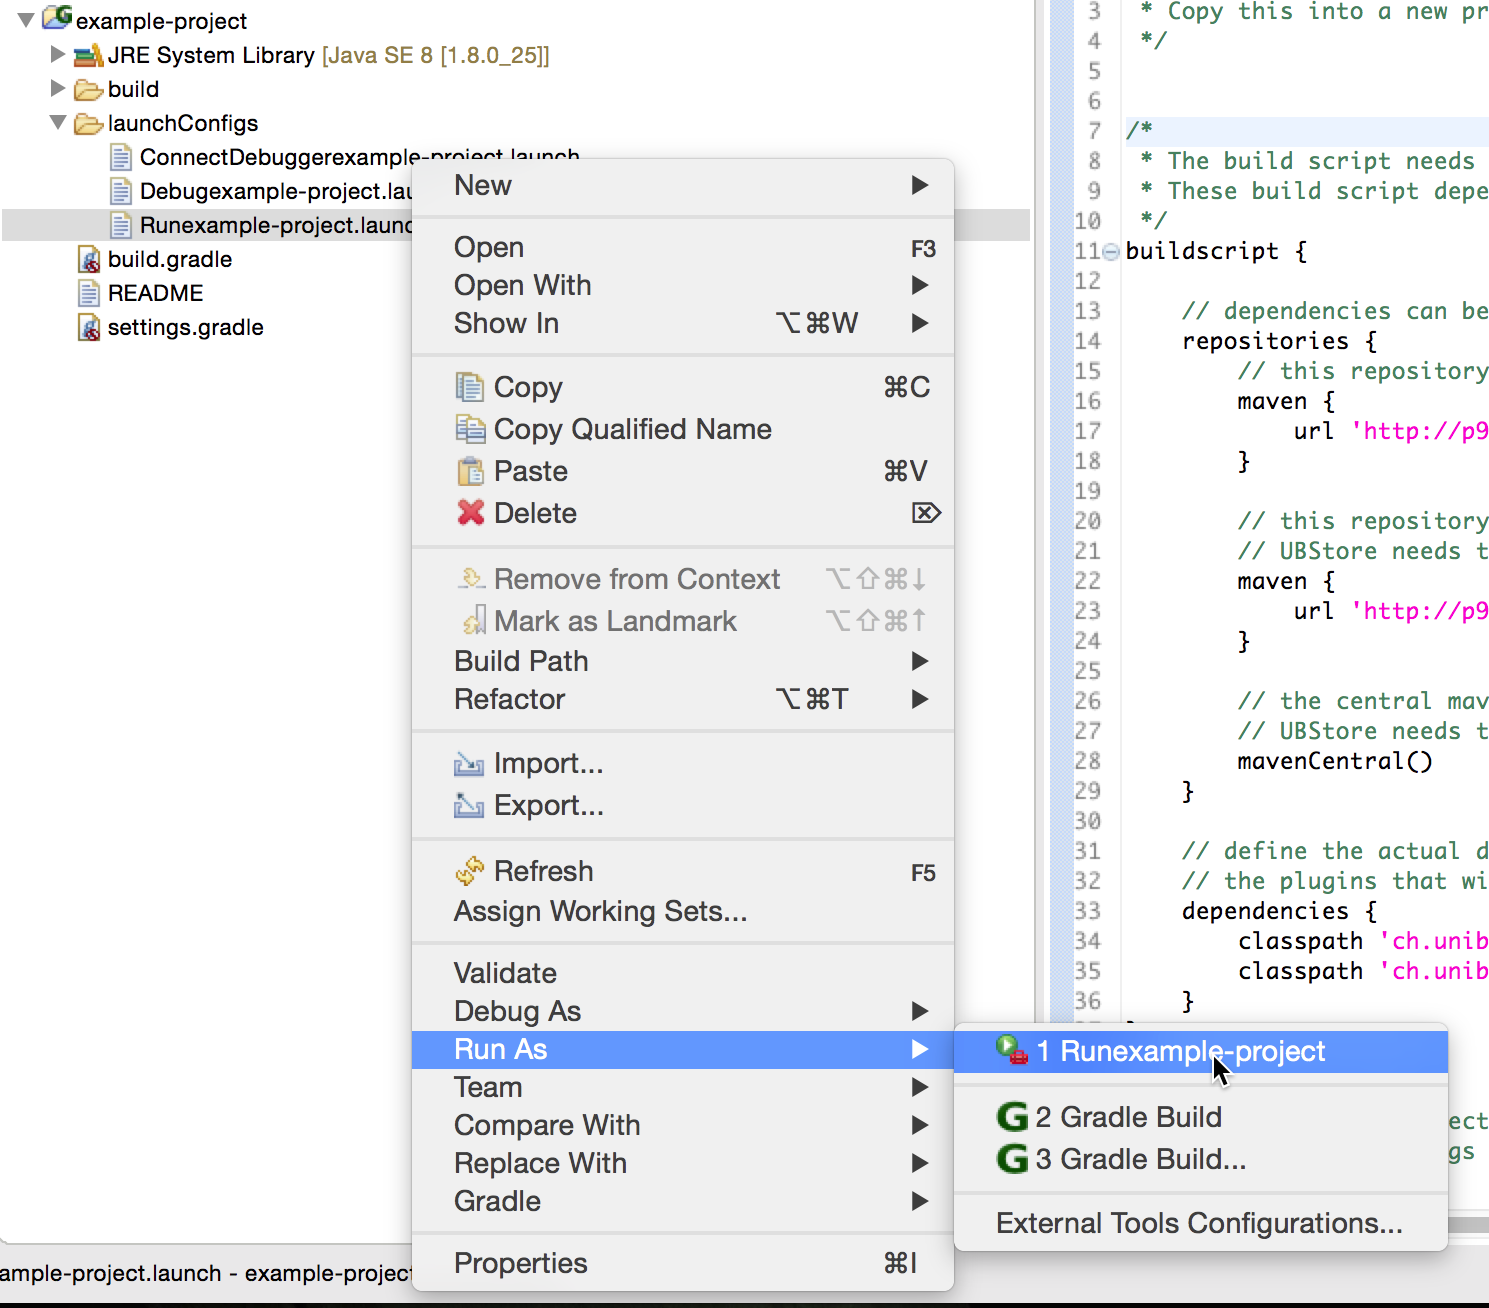
that contains eclipse launch configurations for running and
debugging your application; they can be executed by right clicking
and selecting the first entry in Run as or Debug as. The three
generated launch configurations tell eclipse how to run the project,
start it in remote debugging mode (i.e. it waits until a debugger
connects to port 5005), and connect the debugger to said port.
- osgiFiles copies some files that are generated for the OSGi
bundle jars (such as the
MANIFEST.MFand declarative service XML files) into directories that eclipse recognizes. This enables starting the project as Eclipse Plug-in Projects, running the Application in Equinox. However, there might be differences in behavior running in Equinox compared to the deployable directory.
As an example, do the following:
- run the osgiLaunchConfigs gradle task. A subdirectory called launchConfigs should appear.
- Run the
Runexample-project.launchlaunch configuration, as depicted in the previous screen shot. - (After a few seconds), the Eclipse console should appear:
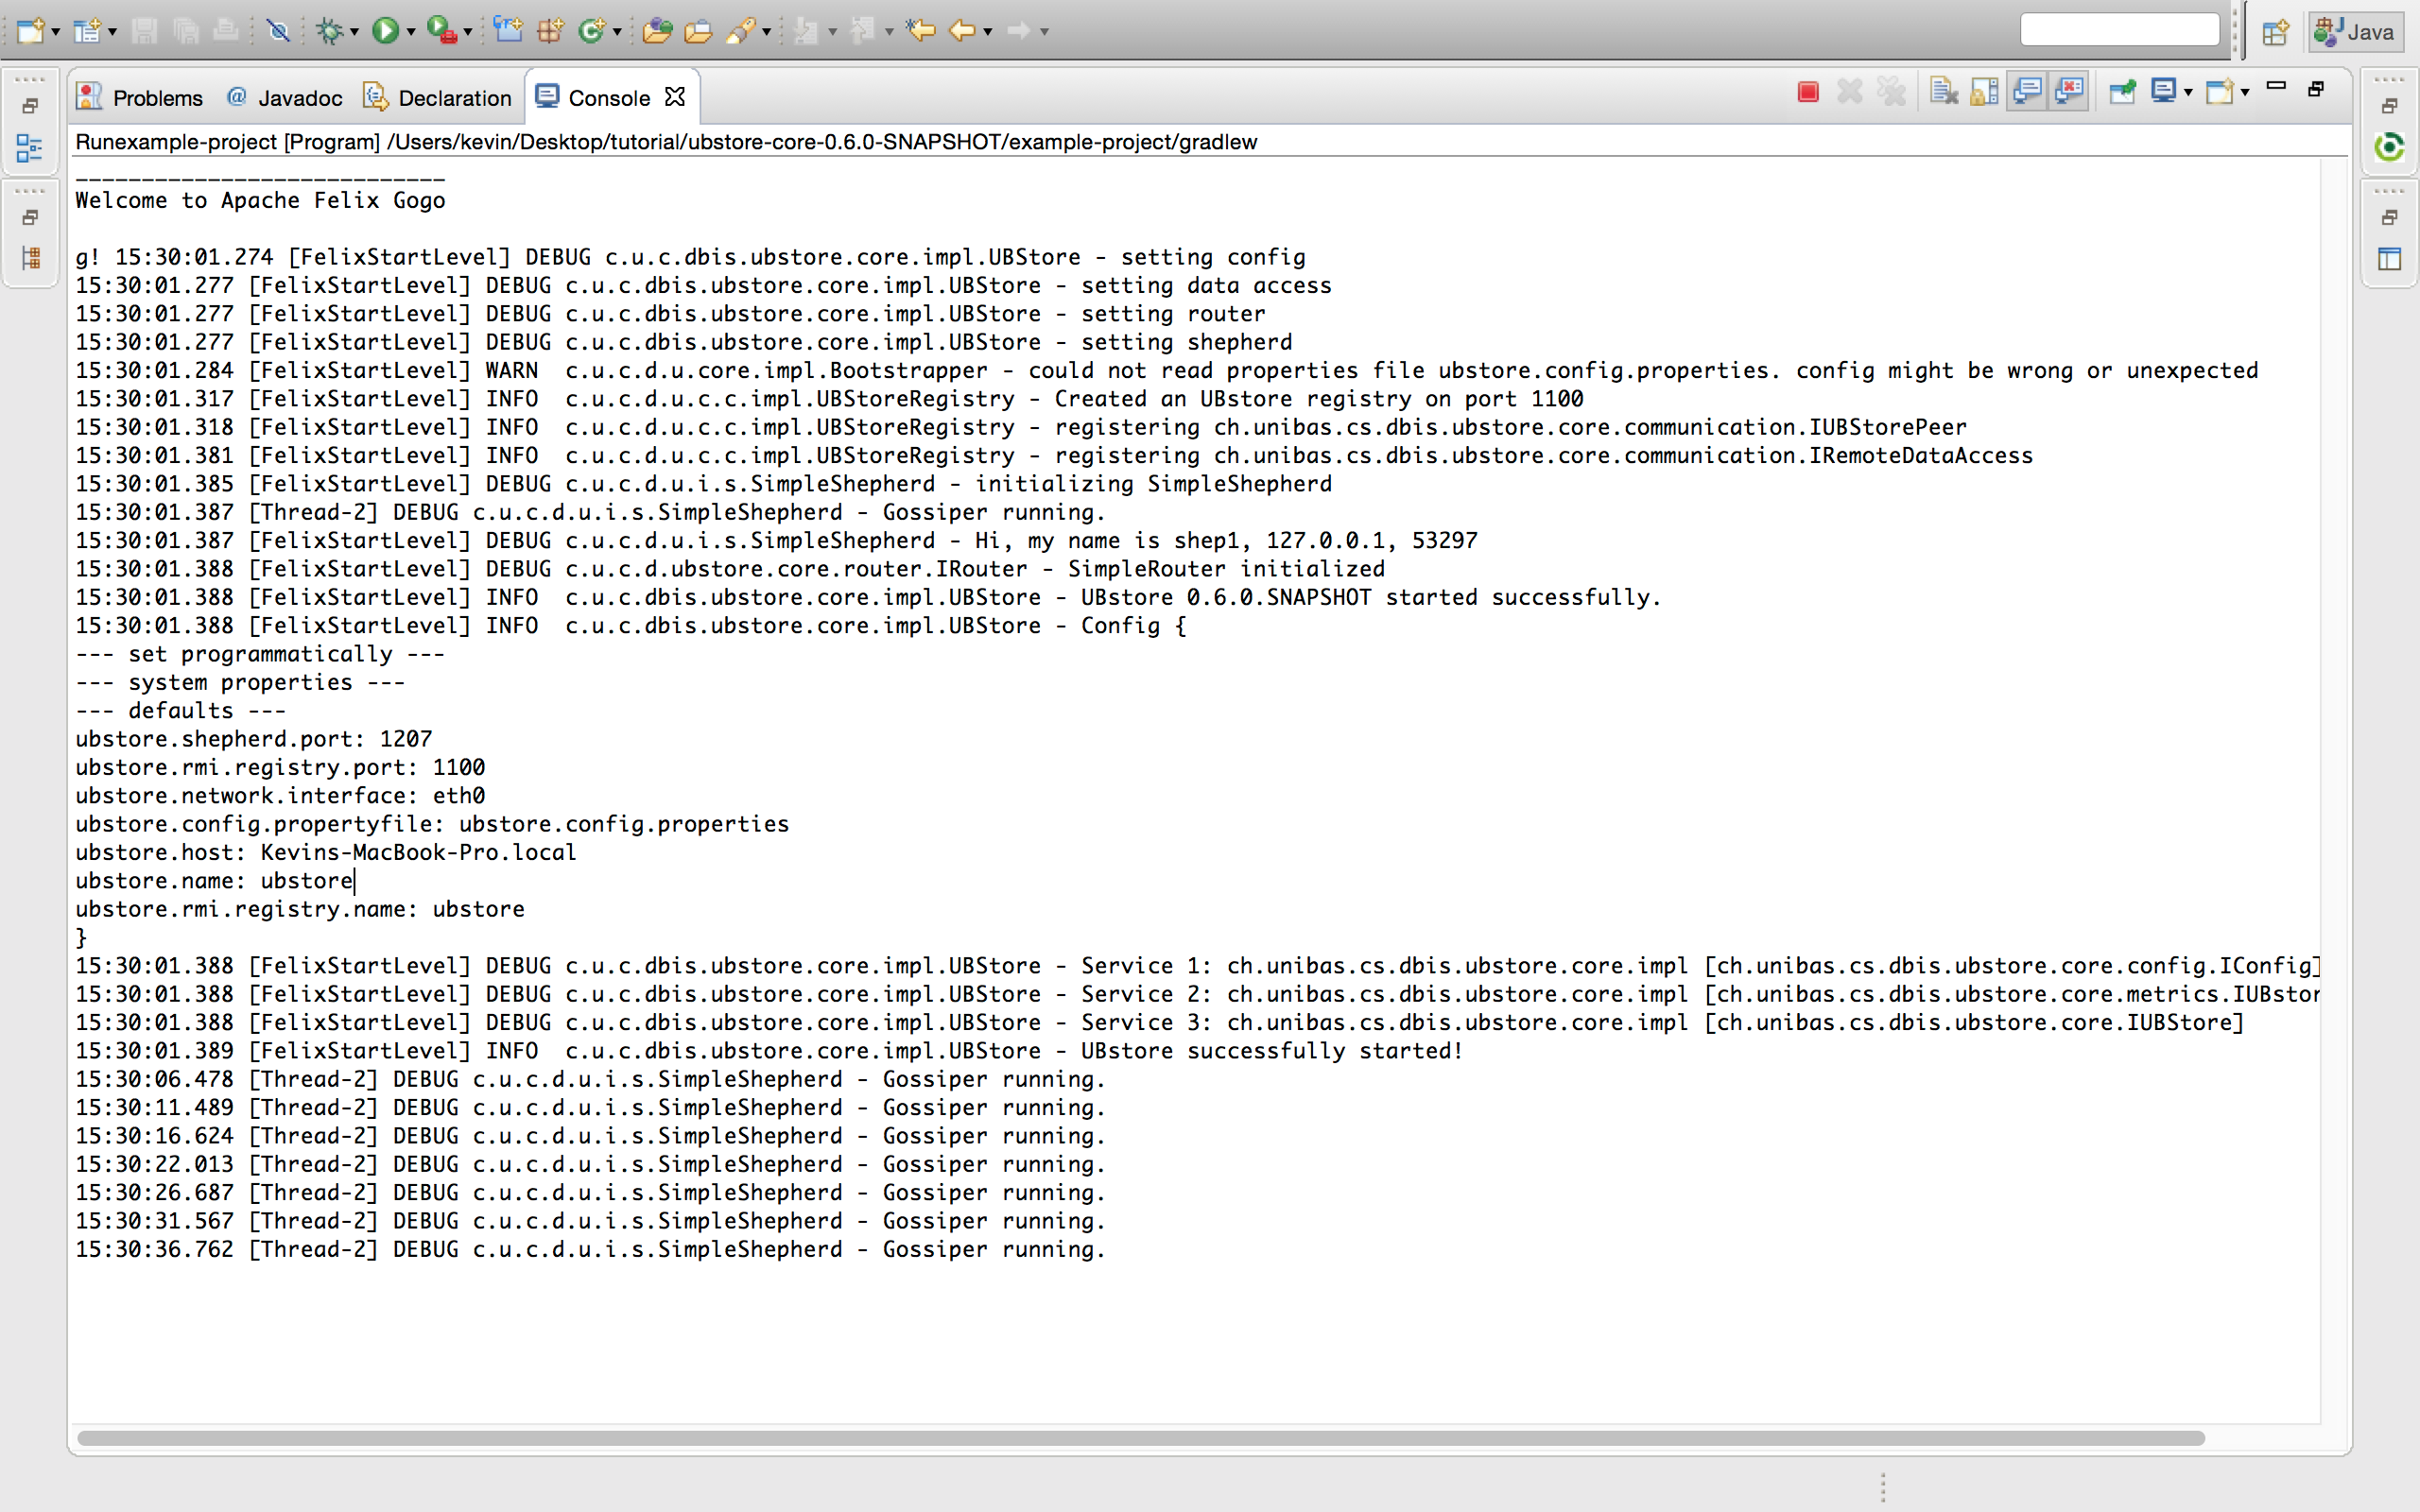 This means that UBStore has started fine.
 - To see a list of running bundles, enter
lb: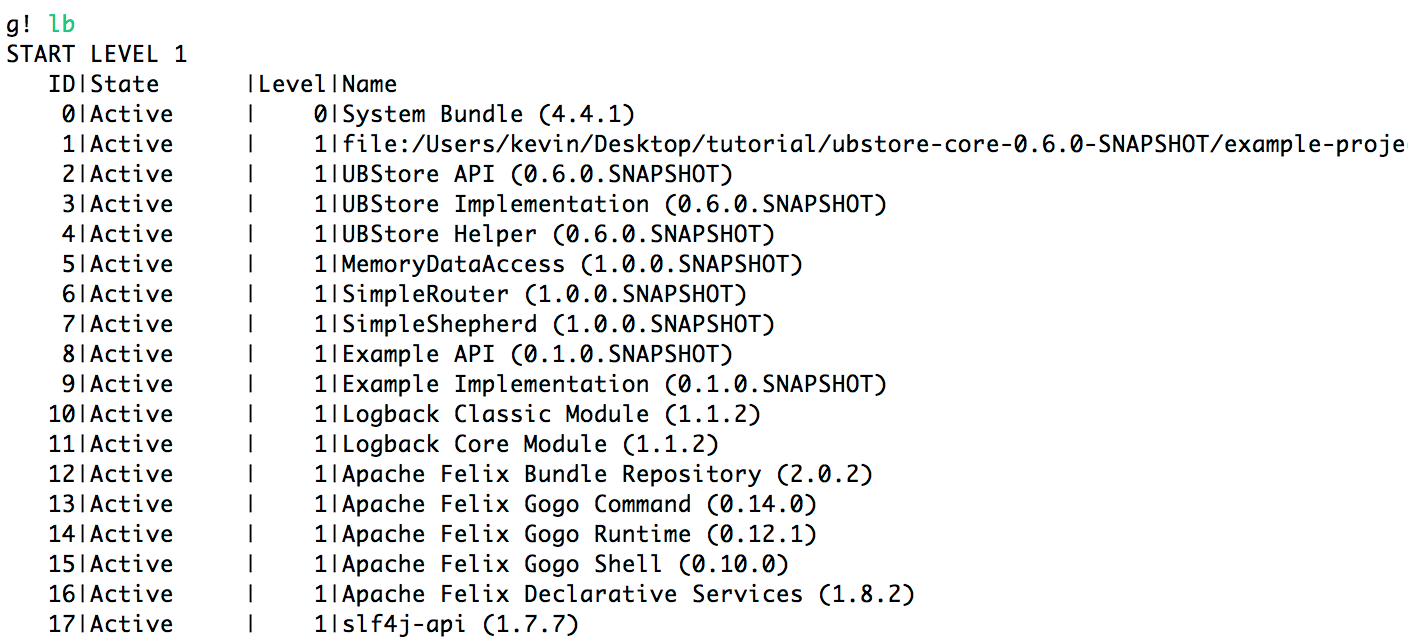 Among multiple UBStore and OSGi (Apache Felix) bundles, you
should see that
 Example APIandExample Implementation are running - To see a list of services, enter
scr:list: Note that the list of services only contains actual implementations.
So among UBStore services, you should see the
 ExampleImplservice running. - To further inspect services and their dependencies, enter
scr:info *id*. You can explore how services depend on each other. This is useful for debugging later on, since you can see satisfied and unsatisfied dependencies for each service.
Next Steps
Once you have understood all of this, there are several things you can do to start developing:
- Make yourself familiar with UBStore concepts and components (i.e. read on in this documentation).
- Reconfigure the example project to start your own: Rename it
by renaming the project directories and adapting the
settings.gradlefile. - Familiarize yourself with Gradle (Chapter 7 and 8 of the Gradle user guide might be helpful)
- Familiarize yourself with OSGi.